What is Vermicomposting?
Vermicomposting is a form of composting which is reliant on red wiggler (Eisenia fetida) worms and microorganisms to convert active organic material into a valuable soil additive which is a great source of nutrients for your plants. This is done by aerobic decomposition. Vermicomposting is an attractive, faster paced, alternative to backyard composting for those who may not have access to an outdoor area. Additionally, unlike backyard composting, vermicomposting does not have the winter slow down period as everything is done inside at room temperature. Similar to backyard composting, vermicomposting will help to close the recycling loop in your own backyard. In an age of rapidly produced waste (about 50-60% of organic material is sent to landfills), this technique offers an opportunity to establish more sustainable and ecofriendly disposal. To learn more about the science of composting visit CompostBN.org.
Benefits of Vermicomposting
The environmental benefits of vermicomposting are similar to that of backyard composting including:
- Increasing soil aeration
- Helping control soil erosion
- Increasing soil’s water-holding capacity
- Reducing water demand of plants
- Neutralizing soil toxins
- Reducing mineral leachate
- Promoting deeper root growth
- Acting as a natural fertilizer
- Improving texture, water retention, and drainage of soil
- Helping extend the current life of landfills
- Reducing air pollution caused by transportation to landfills
- Reducing methane caused by anaerobic decomposition
How To Get Started
Stay tuned for upcoming vermicomposting workshop! Workshop fee includes all materials including red wiggler worms, worm bedding, a bin to host your worm farm, and all the knowledge you need to start vermicomposting.
Maintaining My Vermicompost Bin
Backyard composting and vermicomposting have many similarities but do differ when it comes to what is compostable. While backyard composting needs carbon (browns) and nitrogen (greens) in equal amounts, vermicomposting does not. To keep your vermicompost bin from becoming a nuisance only add the “right” things to your compost bin.
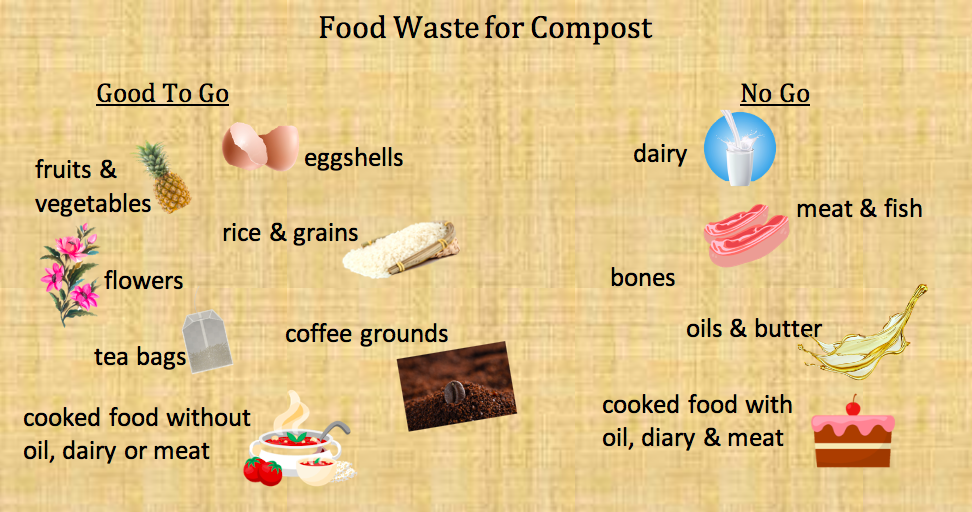
Items that should NEVER be added to a vermicompost bin includes:
• Meat, bones, or fish
• Grease products
• Prepared foods
• Dog, cat, or bird feces
• Plywood or treated wood sawdust
• Diseased plants
• Weeds that went to seed
• Invasive plants
• Compostable or biodegradable containers
• Excess quantities of citrus
• Anything high in salts, ammonia, acid, or alcohol
• Dairy
When adding food scraps, you’re going to want to make a hole deep enough for the amount of waste you are burying, varying the location each time. Once dumped in the bin, make sure to draw enough bedding over the waste to cover it completely. How often to add food waste to your bin depends on various factors, however most add waste in once a week. This will vary greatly depending on the size of your worm bin and how much food waste you generate. As a rule of thumb your worms to food waste ratio should be 2:1.
Harvesting Compost
There are many ways to harvest compost from a vermicomposting bin this includes
- Dump out your bin onto a plastic sheet, make cone-shaped piles over a bright light, once the worms move to the bottom remove the top and sides of the piles. You will then find masses of worms at the bottom of each pile, move these worms to a container and add new bedding back to the bin.
- Let the worms do the sorting by pulling the contents of your bin to one side and adding new bedding to the other side. Only add food scraps to the side with new bedding. The worms will move in search for food, allowing you to harvest the compost
- Divide and dump by removing about 2/3 of the compost for use. The other 1/3 will slowly repopulate your worm bin (this method assumes you have enough worms and cocoons to populate the bin for another cycle).
Finished compost can be used in a number of ways. You can use it both outdoors and indoors as a natural fertilizer for gardens, a lawn dressing, a potting mix and a plant dressing. You can also make compost tea from your finished compost. Compost tea is a liquid fertilizer. To make compost tea, simply fill a sock (nylon sock works well) or a burlap bag with finished compost and tie it with a string to make a “tea bag”. Steep the bag in a container or a jar filled with water, stirring it occasionally, until the water becomes a light or medium brown color. The tea should be sweet and earthy smelling. Use the tea within a few days if possible. Tea bag content can then be added to your potted plants or garden. Compost tea increases the amount of nutrients easily available to plants and, when sprayed on plants, can help suppress leaf disease.
- In New Garden Beds: Mix a 4” to 8” layer of compost into newly reclaimed or poor soils.
- In Existing Beds: Mix a 1” to 3” layer of compost into annual garden beds at least once a year.
- On the Lawn: Spread a thin layer of mulch evenly across lawn as needed, instead of fertilizer.
- As a Mulch: Spread a 1” to 3” layer of course compost on soil as a mulch any time during the growing season to improve soil fertility and reduce watering needs. Do not pile mulch on the stems of plants or the trunk of trees.
- On House Plants: Sprinkle a thin layer of sifted compost on top of the soil to provide nutrients.
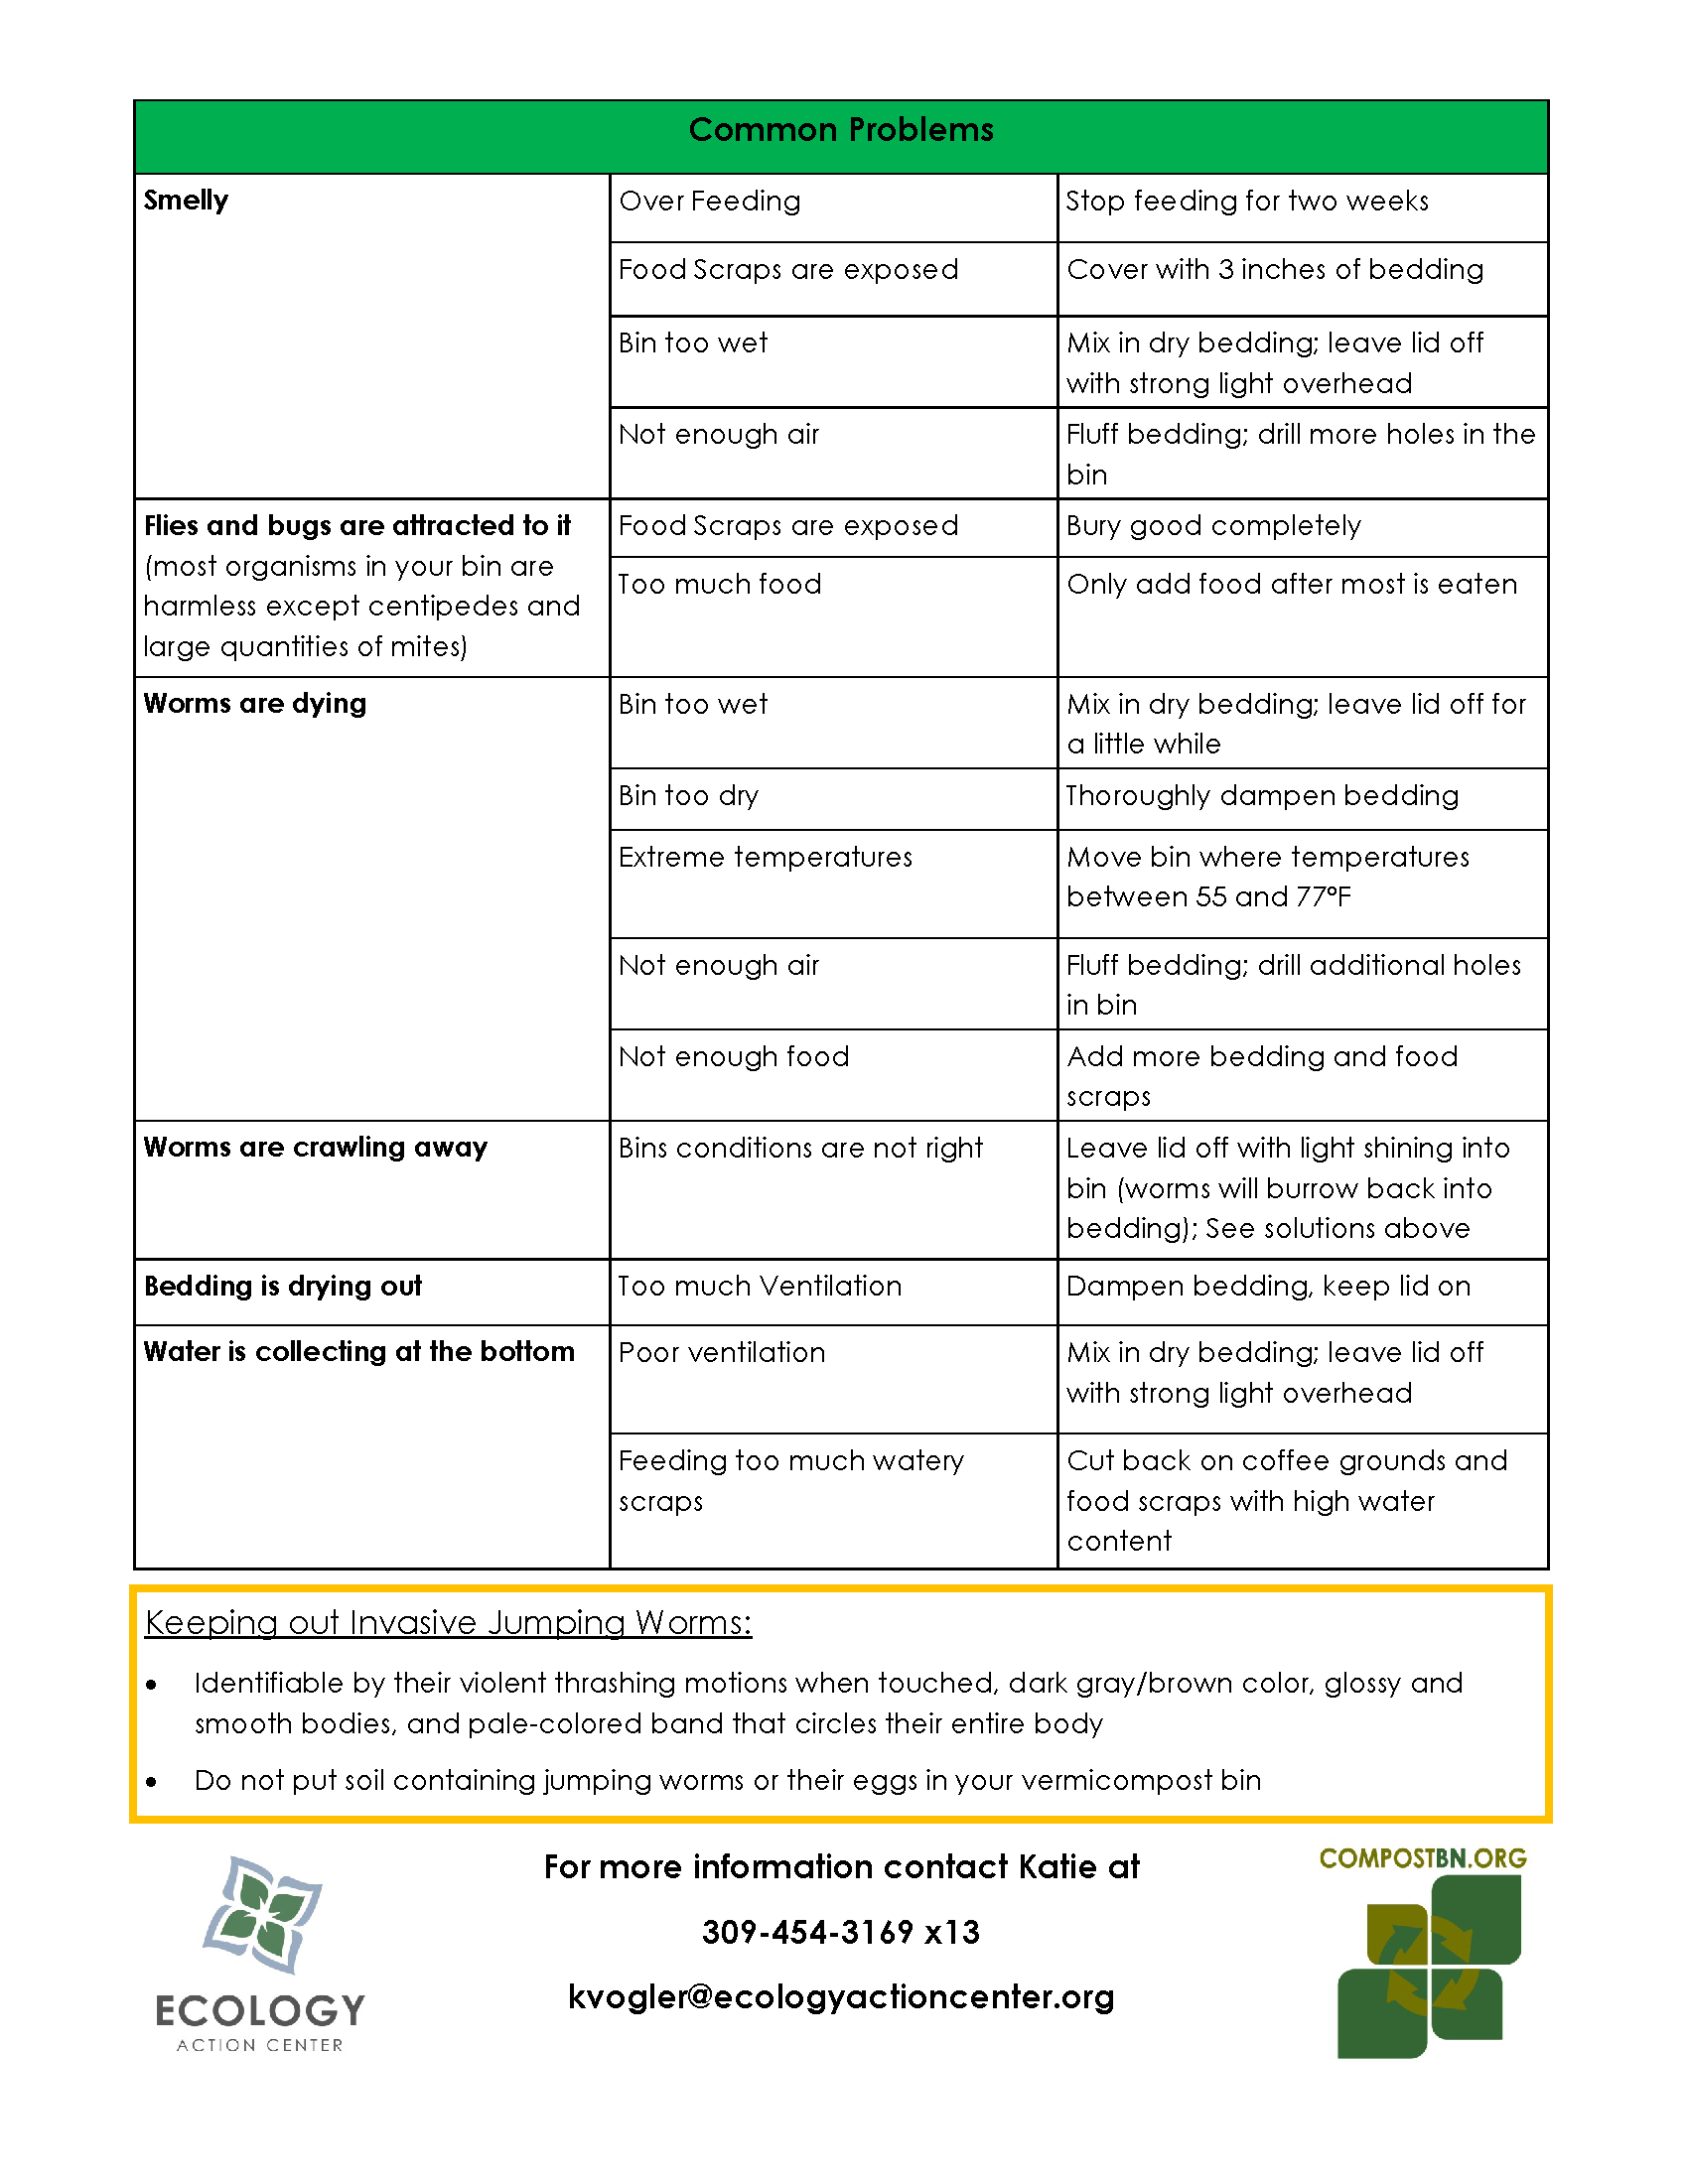
Troubleshooting
Having issues with your worm bin? Find solutions to common problems below (select image to enlarge) or call 309-454-3169 for assistance.